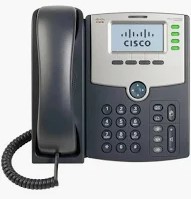
The Cisco SPA-504G is a 4 line VOIP SIP capable phone with monochrome display and Power over Ethernet (POE) capabilities. This phone is fully featured and includes all standard telephony features including call forwarding, redial, speed dial, do not disturb and voicemail. Calls can be made using the handset, the speak or a headset. This phone also has the ability to connect one attendant console to it to expand the number of speed dial lines that the phone can use.
To power this phone, you will either need a POE Switch a POE injector or a 2a 5v wall wart power supply.
This phone also provides a web based interface to configure the features of the phone.
After connecting the phone to the network and letting it boot, you can then obtain the IP Address of the phone.
Press the Setup button. This button looks like a piece of paper with the upper right corner of the paper folded down.
You can then scroll down to the Network option or hit the number 9 Button.
Hit Select
Option 2 should show the IP address of the phone. Note this down as you will need it to configure the phone.
Open a web browser on another computer that is also on the same network as the phone
Put the IP address you obtained above into the address bar
Once the webpage comes up, in the upper right hand corner click Admin Login and then Advanced. This will bring up all the options for the phone. You should see a number of tabs across the screen.
You should set a static IP address for the phone. This makes accessing the Web Interface easier and helps the phone connect through the router a little easier.
Click on the System tab
Find and set the following fields on that tab.
Connection Type: Static IP
Static IP: You can either set this to the IP Address you obtained above, or if you use specific IP scheme on your network, you can set it to that.
Gateway: This is the IP address of your Router, the one you use to log into the web interface of your router.
Primary DNS: 8.8.8.8
Leave everything else at default and hit the Submit All Changes button at the bottom of the screen.
At this point your phone will reboot. Once this is done, log back into the Web interface using the IP address we just set as static and make sure you are logged in as admin and in the advanced features mode.
If you have to factory reset the phone, by default, the phone will have Extension 1 set for all 4 line keys for the phone. We will need to fix this so that each of the line keys is it's own extension. Otherwise each line will function like line 1. There is no need to repeat the line.
Click the Phone tab
Scroll to Line Key 2 and set the extension to number 2
Scroll to Line Key 3 and set the extension to number 3
Scroll to Line Key 4 and set the extension to number 4
Leave everything else at Default and click Submit All Changes at the bottom.
The phone will reboot. Once this is done, log back into the Web interface and make sure you are logged in as admin and in the advanced features mode.
Now we can finally configure your extension for AmateursOnVOIP.
Click on the Extension tab you want to use.
For example, if this is the only or the first account on the phone, click on the Ext 1 tab. Otherwise if Extension 1 is being used, select the tab for the next free extension.
Find and set the following fields on this tab:
Line Enabled: yes
NAT Keep alive Enable: yes
NAT Mapping Enable: yes
SIP Transport: UDP
Proxy: the domain and port of the server from your credentials email
Example: pbx.AmateursOnVOIP.com
Register Expires: 3600
Display Name: This can be what you want to call it. This sets the display name for the line key on your phone screen. Suggested it would be your extension on AmateursOnVOIP from the credential email.
User ID: This is the extension number from the credentials email.
Password: The password from the credentials email.
Leave everything else at default and click Submit All Changes at the bottom.
The phone will reboot. Once it comes back up, the line you just configured should show green, showing that it is connected to the server. When you pick up the handset you should have a dial tone.
Now we need to make a test call to make sure things are working. You can dial *60 (Talking Clock) to test your connection.
To make a call, you can do this a couple of different ways:
Pick up the handset, Hit the speaker button or press the line key. This will give you a dial tone. Dial the number you want to call.
Just start dialing the number you wish to call and then do one of the above to start the phone dialing automatically.
The 504G has a button on the phone that will automatically dial your voicemail.
To configure this function
Log into the web interface and click on the Phone tab.
Find the field called Voice Mail Number
Set this to *97
Click Submit All Changes at the bottom.
The phone will reboot. Once it comes back up, pick up your handset, making sure to select the line for your AmateursOnVOIP Extension and hit the Voicemail button on the phone. It should dial into your AmateursOnVOIP voicemail
If you have other services on the phone, this configuration will also allow you to dial your voicemail on those services.
The phone will display the current date and time on the display in a bar at the top. This can be set to stay in sync automatically with the correct time and not have to set a Daylight Saving Time rule or manually set the date or time all the time (the clock can drift a little over time).
To configure this:
Click on the System Tab
Find and set the following fields
NTP Enable: yes
Primary NTP Server: pool.ntp.org
Click on the Regional Tab
Find and set the following fields:
Time Zone: Set to your time zone offset (Example: US Eastern Time is GMT-04:00)
Daylight Saving Time Enable: yes
Click Submit All Changes at the bottom.
The phone will reboot. Once it comes back up, verify that the time is set properly. It should now update automatically with Daylight Saving Time and also stay in sync and the time should not drift on the display.
Here are some other fun Tips and Tricks you can do with the phone:
If you go to the Phone tab and find the field marked Station Display Name you can set this field to display some text in the top most bar of the display on the phone where the clock is at. After setting this, click Submit All Changes at the bottom and let the phone reboot.
For example, I (Jeff, N8ACL) set mine to Jeff, N8ACL and now that displays in that bar.
The phone has the capability to display a small BMP logo on the main part of the screen or it can display some text. I (Jeff, N8ACL) like to have it show text. To configure this:
Click on the Phone tab.
Find the following fields and set them:
Text Logo: You can set this to whatever text you want displayed. For my phone, I set it as G A R S - VOIP
Select Background Picture: Set this to Text Logo
After making any of the changes above, click Submit All Changes and let the phone reboot. Once it comes back up, verify that the changes you made are showing on the phone.